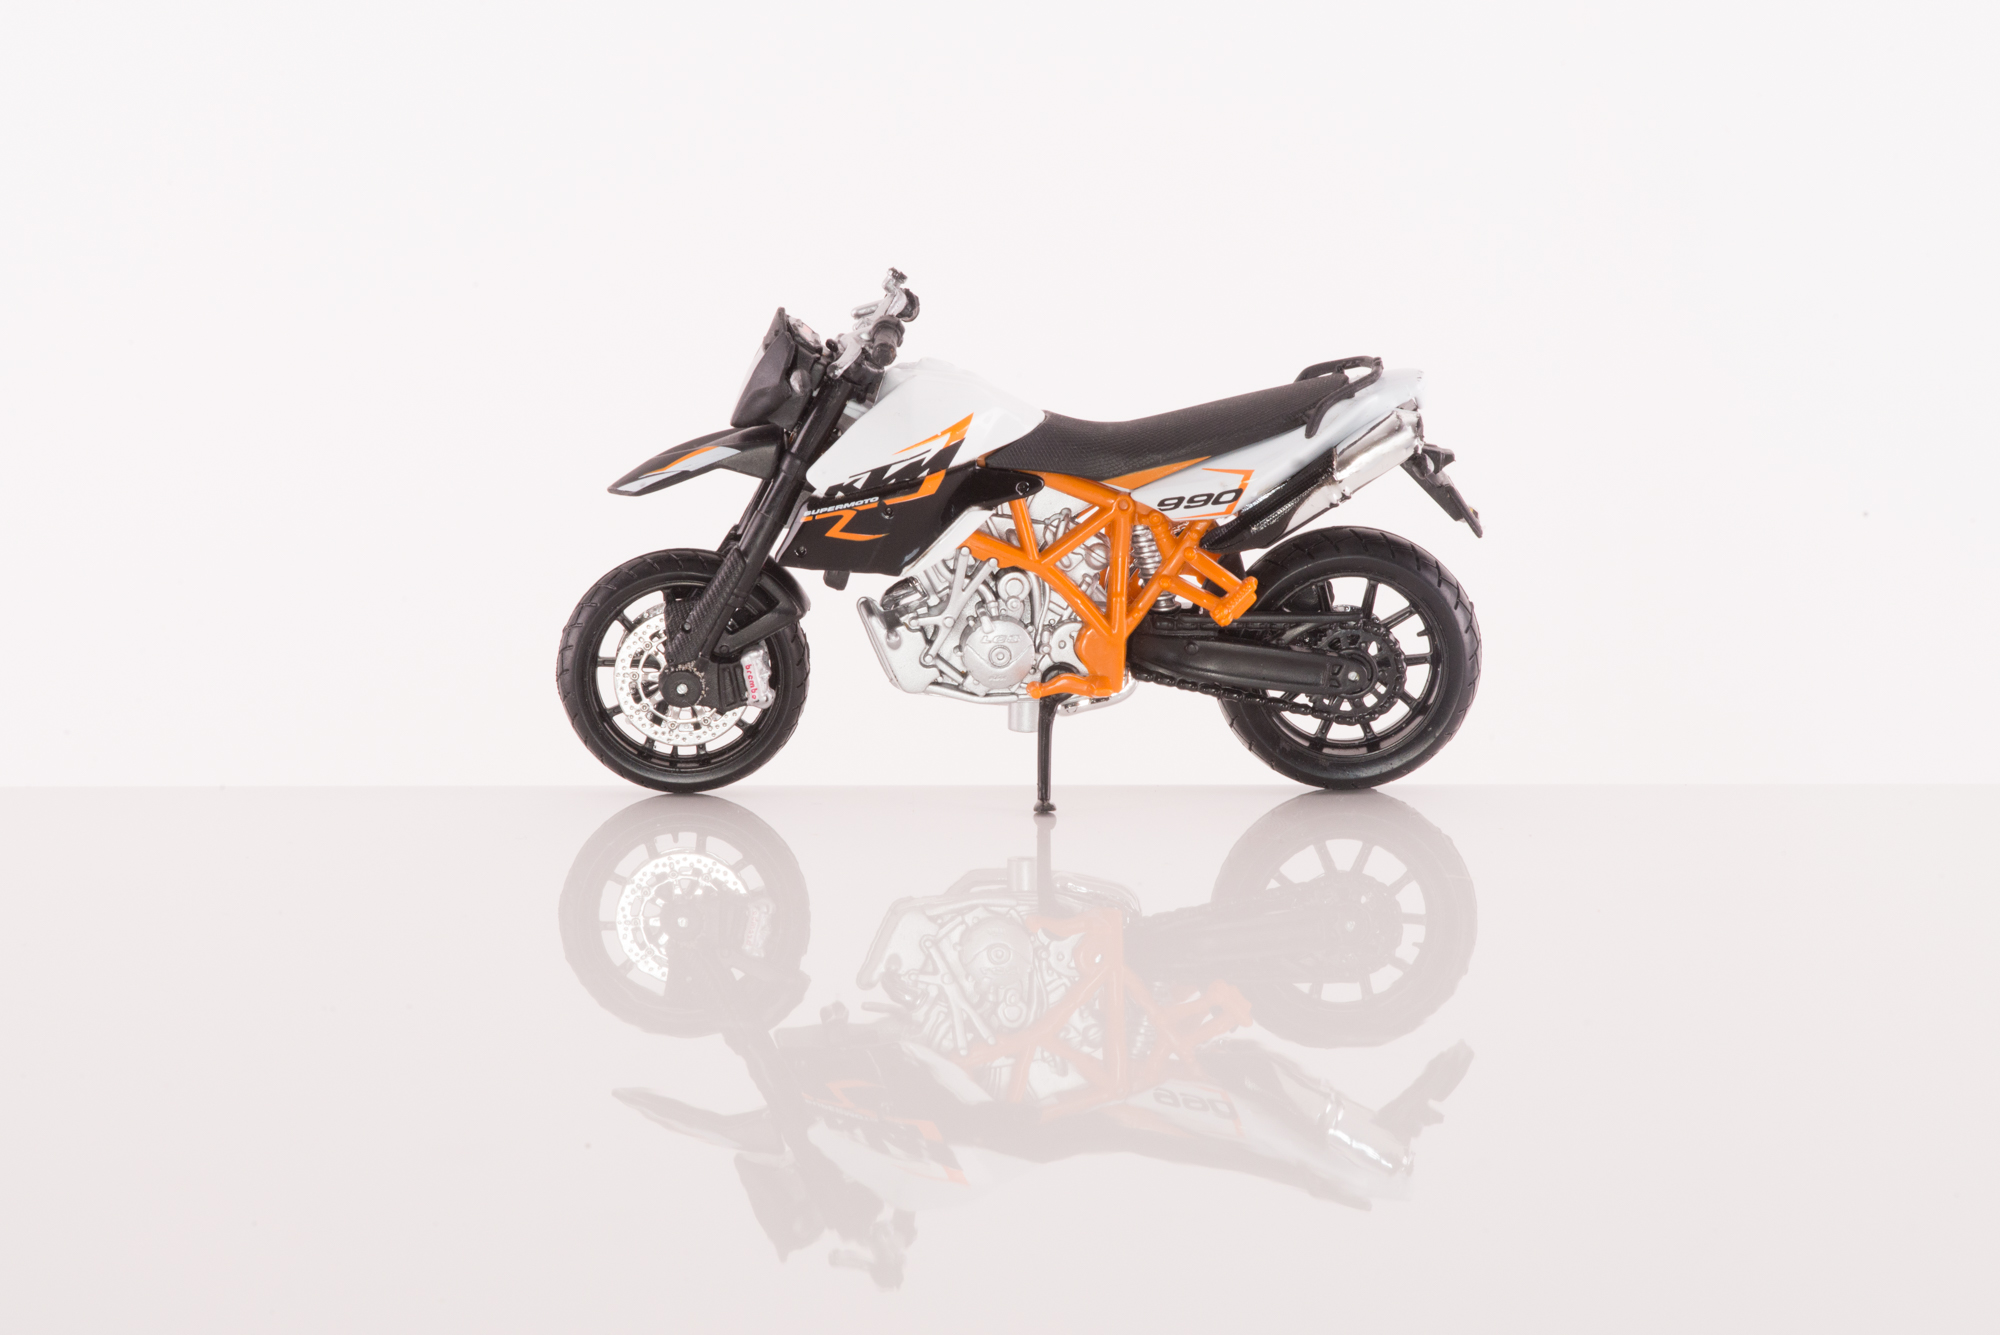
I hope you all survived easter well and that you had some relaxing days. Today I want to share with you the process of creating the images I used for the easter greetings. The source images looked like this:


In case you are wondering: I decided to include a bike in the shots, because bike photography has been quite dominant last year and I plan to make some bike shooting sessions this year as well. Also the easter bunny should keep up with technology and ride stilishly for delivering the eggs. Hopping around is so old-school…
Ok, enough shenanigans. Here is a list of the equipment / props used for the shots:
- two easter bunny figurines (a small coloured one and a big, white one, see below)
- model bike (KTM Supermoto 990)
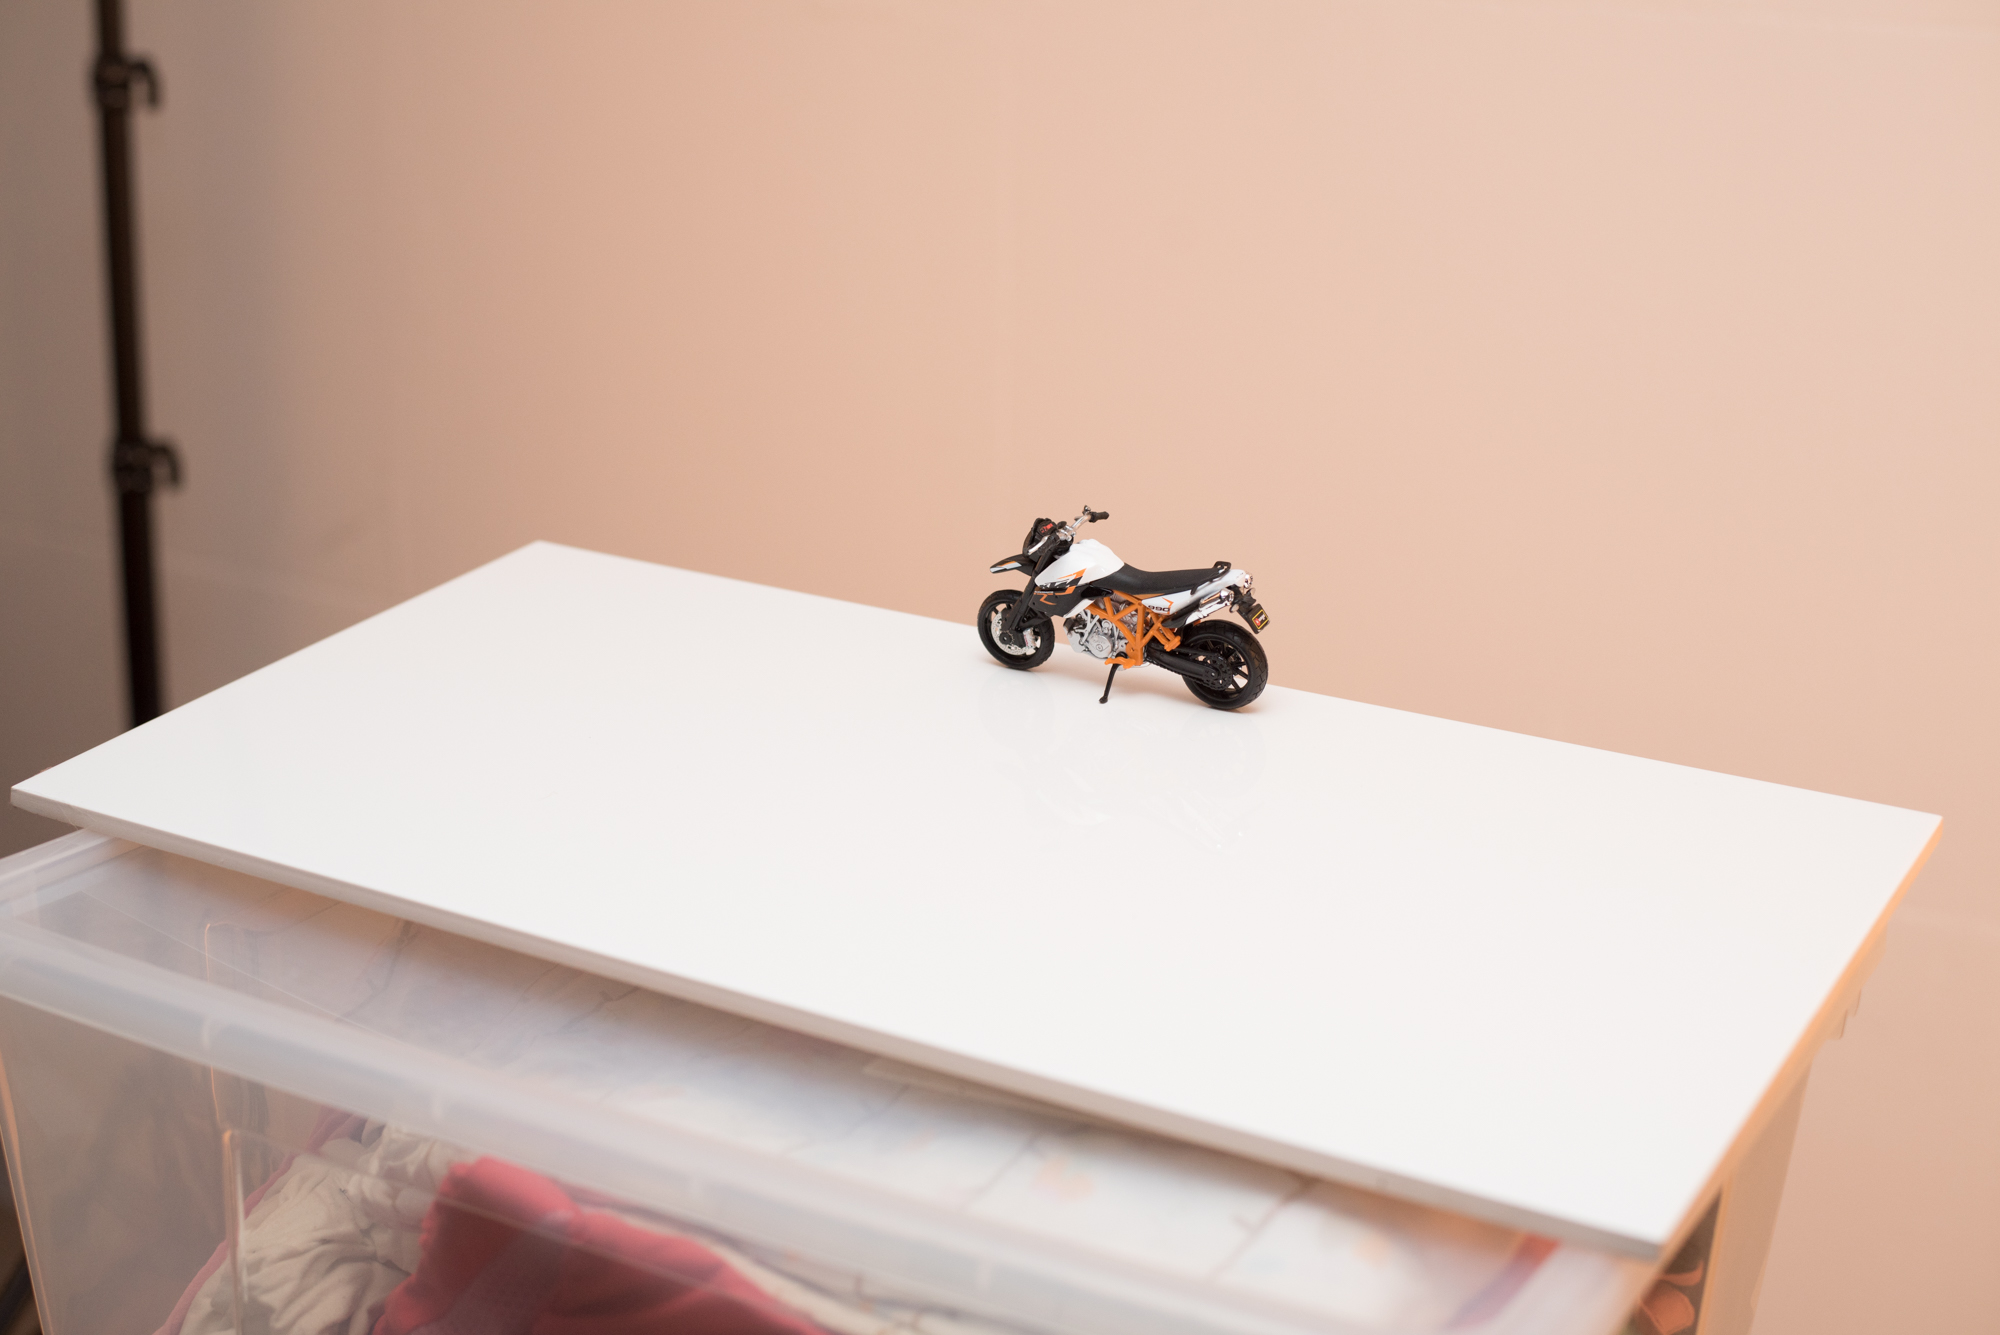
- a white floor tile from the hardware store
- a table and a box for popping everything up to a comfortable height
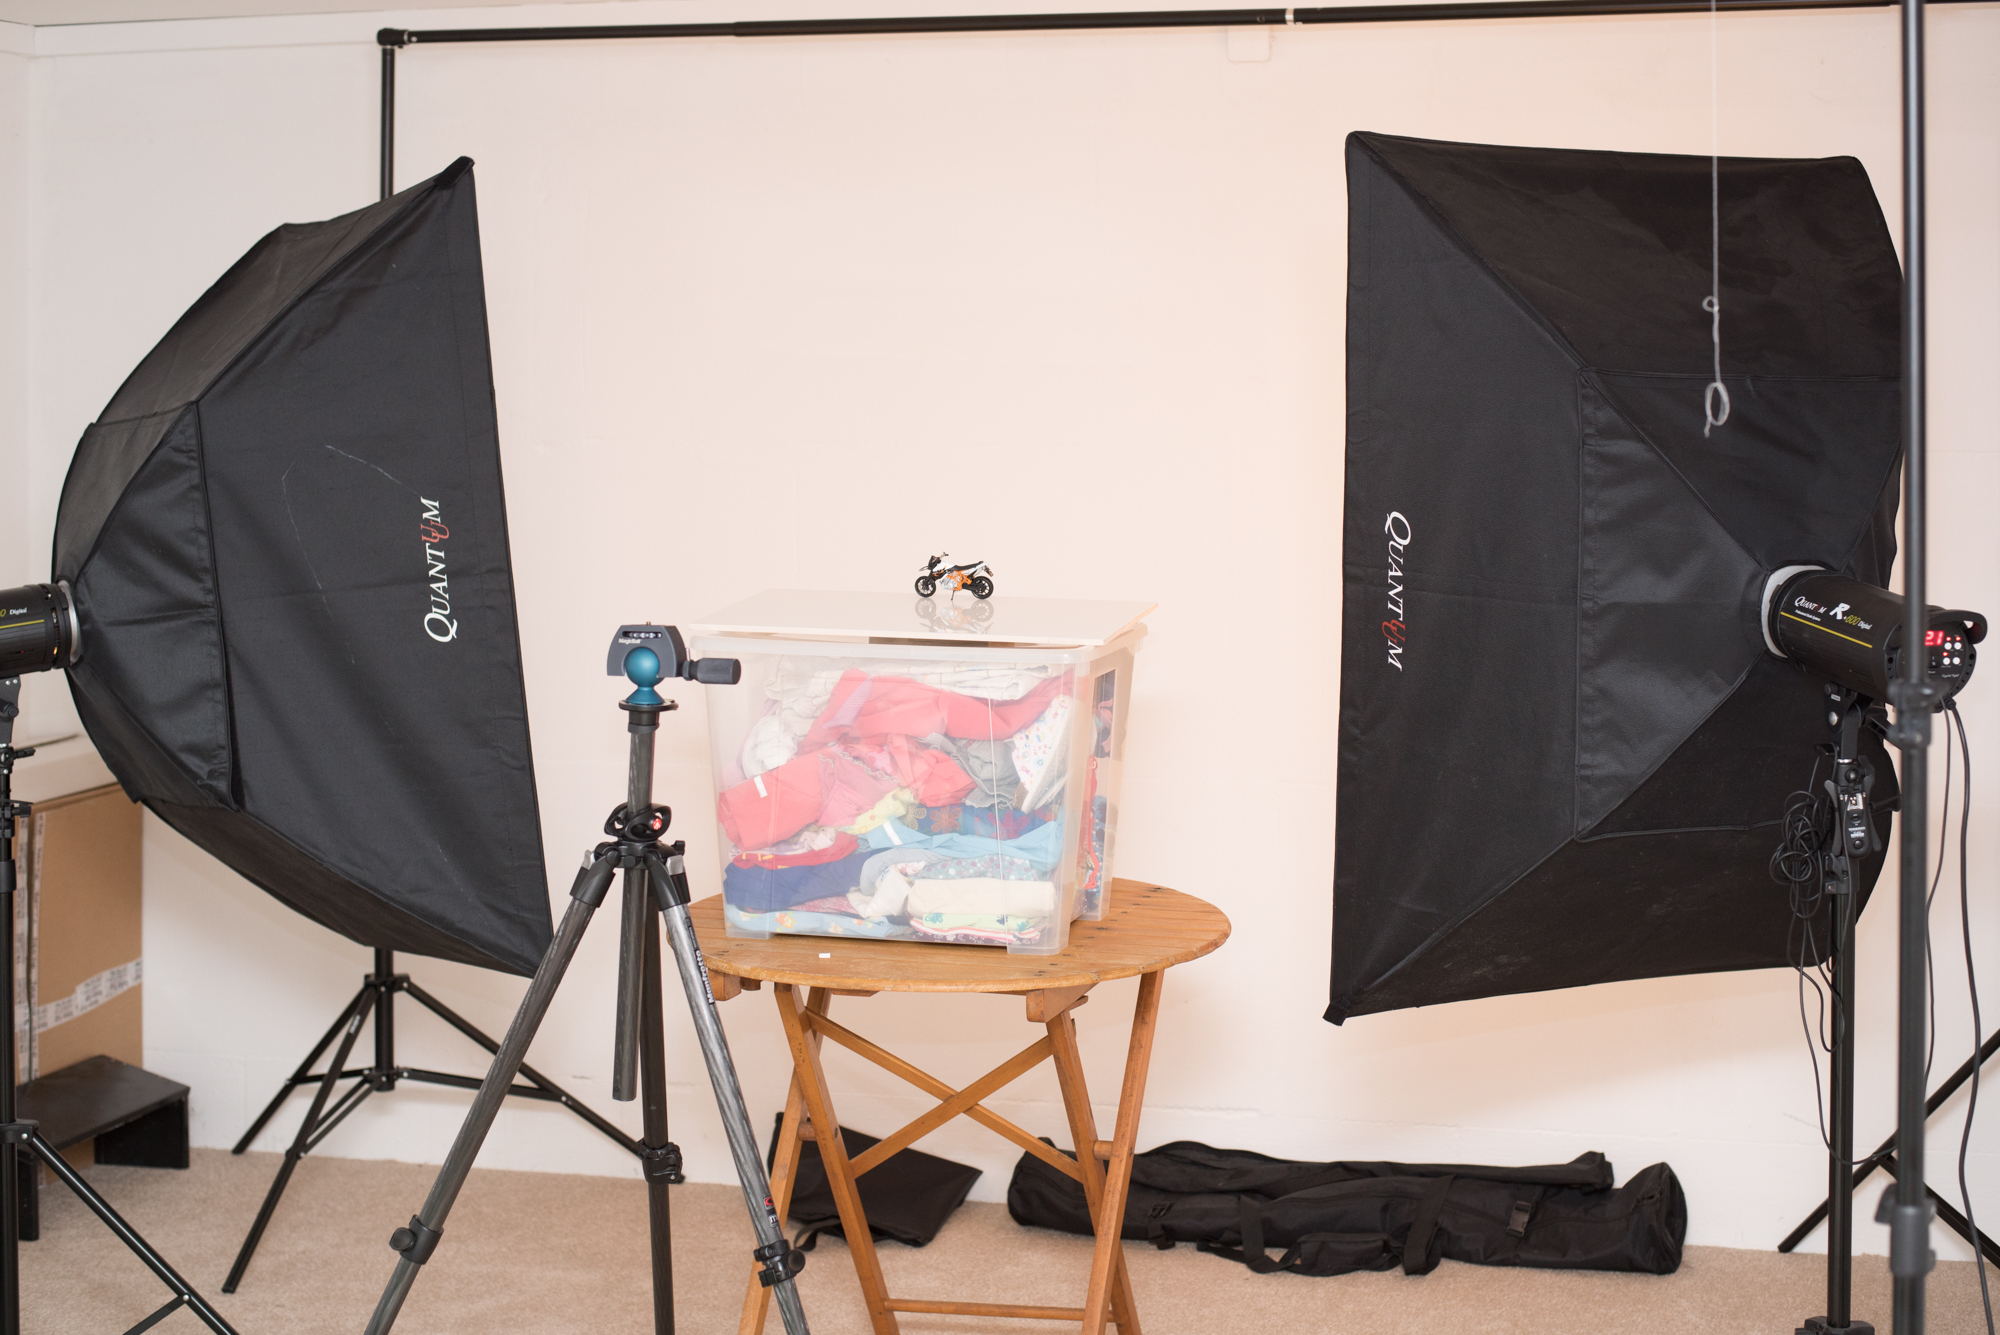
- two studio flashes and softboxes
- one handheld flash and
- a camera of course.
The softboxes were aimed at the bare white wall, the model bike and easter bunny figurine placed between the softboxes. Take care that the models are not in the center of the softbox light cones. The light from the softboxes should mainly hit the wall in the background. A handheld flash can then be used as a main light to illuminate the white tile and models.
 That’s how far the recipe goes. All flashes operate on manual mode. Here one has to play with the settings quite a while until you find a good combination of background / foreground flash power. I chose to first decide for the camera settings (ISO, shutter speed, aperture) and then adjust the power of the flashes aimed at the background, until the background was pure white on the image. Then I added the handheld flash and experimented with flash power, distance and angle of the flash. I found that a flash hovering above the scene and firing downwards will just blow out the tile and not cause any visible reflection of the bike.
 For a nice reflection on the tile as seen above I used an orbis ring flash head with handheld flash to get soft light and fired the flash from camera level (with the lens sticking through the ring flash as it is supposed to be). Now you have to find the point of equilibrium where the foreground (tile and bike/bunny) are lit well, but the tile is not too dark against the background. Takes time, play with the settings, be patient.
Balancing light well is necessary to illuminate this sucker:
 White rabbot on a white tile against a white background. Phew. I did not use a ring flash here, since the doughnut-shaped reflection would have been too dominant on the clear white figurine. Instead I fired a handheld flash against the ceiling and varied distance to the ceiling and flash power, until the results were satisfactory.


Lots of good info-Light position was very helpful. Thanks!