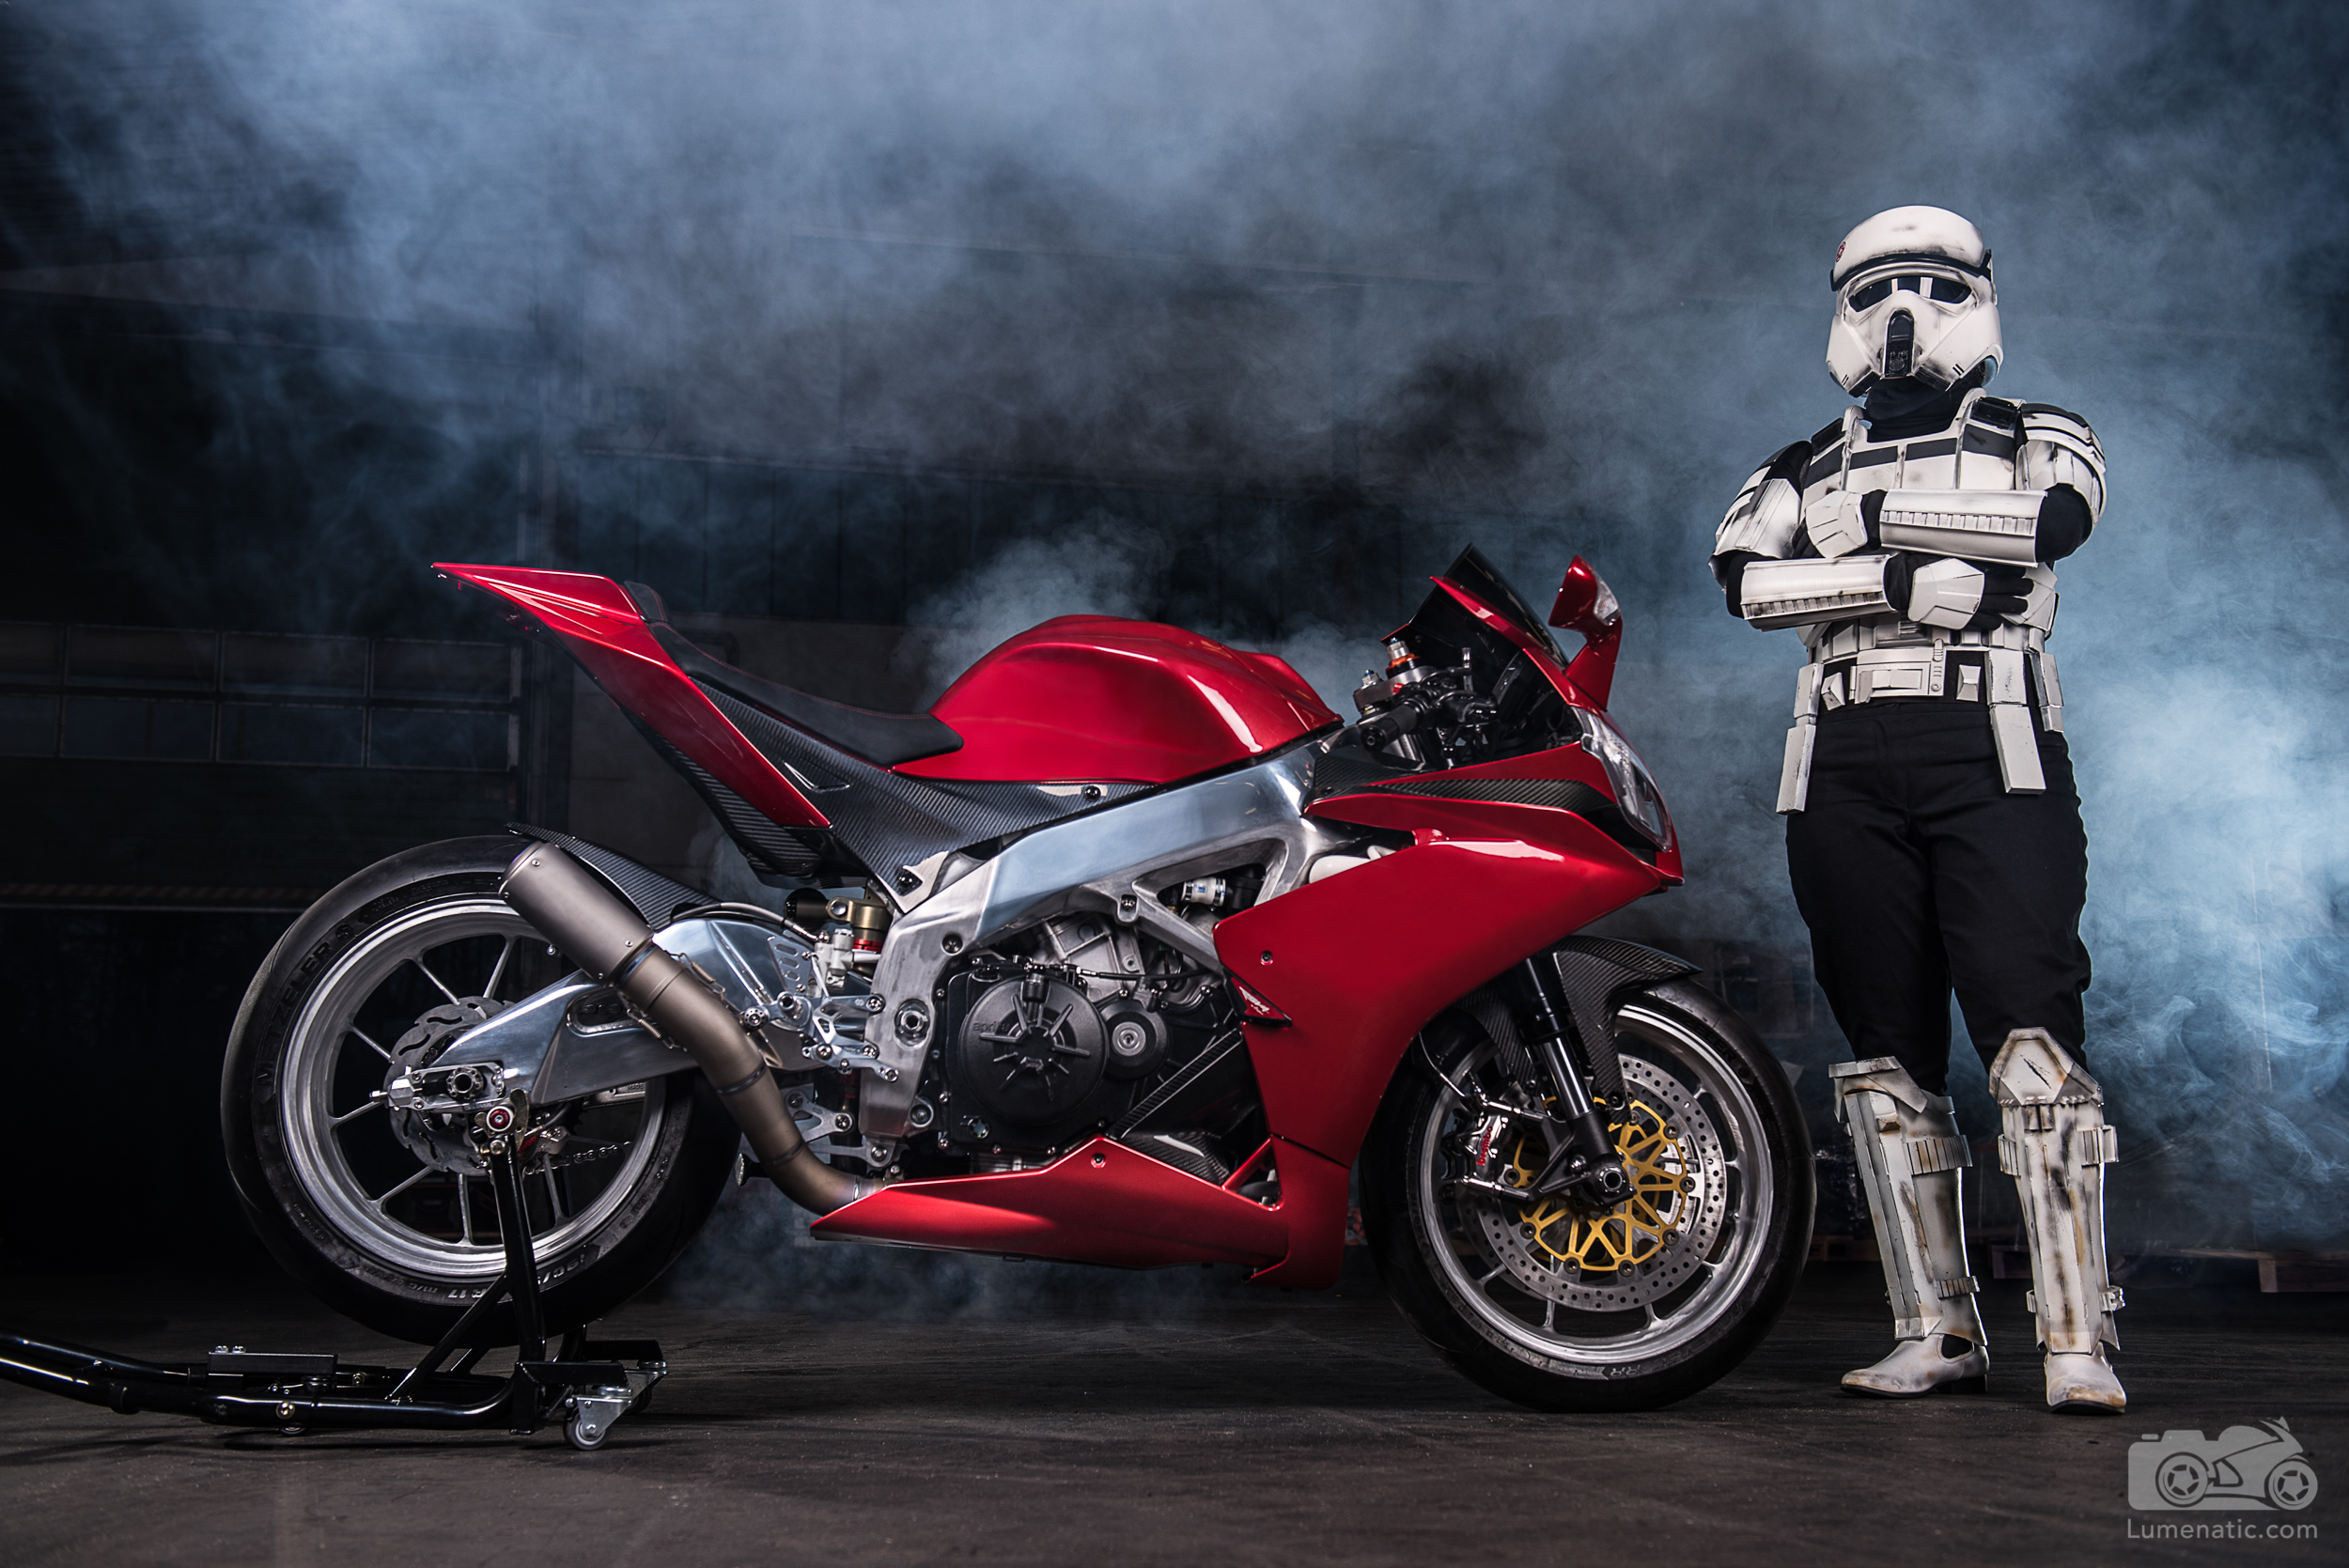
Recently I photographed an Aprilia RSV4 on a day-long shooting. We had a lot of time at hand, so I was able to experiment with a lot of techniques. I also invited some Star Wars cosplayers to the shooting, which I knew from a local fan club I contacted a while ago.
I could (and probably will) write several blog entries about this shooting, but today I will focus on the use of a smoke machine. To say it up front: I have not used a smoke machine for long, so my experiences are not that deep, but from the few times I employed it on a shoot I can already derive some useful thoughts.

Smoke machines are affordabe, the cheapest ones I found cost around 20 Euros, the one I bought was somewhere between 40 and 50 Euros (it is a 900W machine). The smoke is created by vaporizing a special smoke fluid. The smoke is non-toxic (d’uh…) and disintegrates after a while (although there are huge differences in the time the smoke lasts, more on that later).

Smoke detectors
First of all, make sure the location you are shooting in does not have smoke detectors OR ensure that the smoke detectors are deactivated for the duration of the shooting! It could become an expensive shooting if the fire brigade makes a visit on location.
In my case I was lucky, the warehouse did no have smoke detectors installed.
If you are shooting with a smoke machine it is also a good idea to inform the fire department about it. Imagine someone is passing by your shooting at a distance and all he sees is smoke coming up – it is likely he will call the fire brigade. And once they are called, they will roll out, no matter what. If you inform the fire department up front, do not call the emergency number but look up the “normal” telephone line. I did it before a fire shooting last year. the call lasts less than a minute. They will ask you your name and phone number, where you are shooting and in which timeframe. Helps keeping trouble down.

Working with smoke
Due to its nature smoke can not be controlled very well. It tends to go everywhere and fog up the place. You pretty much want smoke around or behind the bike, but not between the bike and the lens. Because smoke there the smoke only adds a milky haze to the image, taking away the brilliance of the intricate details on a motorcycle. To illustrate this just look at how the warehouse looked after using the smoke machine for a while (we tried to use short bursts but it adds up).

So how can this be tackled? There are several approaches.
First of all, try to use only scarce amounts of smoke. Don’t fire minute-long smoke barrages, only give it a few seconds. Take images all the way, have the camera in front of your nose and shoot. The moments immediately after discharging from the machine are the ones where the most interesting patterns occur. The smoke is still thick then, and it will expand and distribute with every second.
Use smoke fluid with a short lifetime. There are several classes of smoke fluids, categorized into the different lifetimes. Unfortunately my machine was filled with long-lasting smoke as I did not pay attention when buying the fluid. I now bought replacement fluid, which is a quick dispersing type. Will use it the next time.

Ventilate the room from time to time. Unlucky for me, the ceiling windows of this warehouse could not be opened, so there was no wind passing through the open doors. It took a long time for the smoke to clear. Remember to inform the fire brigade up front, see above. Imagine you open the door and smoke pours out. To an outsider ot may look like an emergency.
Use cardboard or similar tools to dissipate the smoke. This may help to clear away smoke from the bike, although you will also spread the smoke by that.
This video, made out of the few behind the scenes videos I got from the biker via WhatsApp (hence the low resolution) give a small glimpse of how we worked.
I also built a “smoke ramp” out of carboard as can be seen on the crop of the BTS image above (sorry, low quality). Here you can see nicely how it worked. The smoke hit the cardboard ramp and was diverted upwards. The carboard was propped up using a water bottle. Directly before (behind) the ramp the flash was positioned. I found this to be pretty effective and it helped to guide the smoke to where I wanted it to be. Note: The smoke can not be used in the upright position, which is why I chose to use this method.

LIGHTING SMOKE. Smoke is very effective when backlit. My two main lights were Godox 600WS studio flashes with 80x120cm softboxes, pointed at the bike and the cosplayer. Behind the bike I placed one flash on the floor, pointing upwards. This would illuminate the smoke from the back. For the image of the Sith fighter above (the one with the red light sabre for all non-Star Wars fans) another light came from the side.

The image above is perhaps the best illustration of how this worked. The smoke rose behind the bike, the main lights illuminate the bike and the Storm Trooper, the smoke is lighted by the flash on the ground.
These are my experiences with smoke so far. Did you perhaps work with smoke machines? If yes, what are your ideas and methods? Let me know in the comments or write an email to julian@Lumenatic.com!


