In 2015 I extensively blogged about motorcycles and posted some GoPro videos. Working with video is a pretty new sensation for me, one has to get used to the fact that the time invested into one video could also produce some dozen images. The “output” in terms of posted material, is less. Making a good video requires planning, a lot of patience and a lot of time in post processing, but I am repeating myself.
In the first videos with my GoPro I experimented with different camera positions on a motorcycle. I quickly learned that vibrations cause the video to be very unsteady, and that is where I learned about gimbals. A gimbal is an electronic steadycam. The camera is mounted on a device that has two or three motor-driven axes. A sensor in the gimbal detects the movement of the camera and steers the motor to a counter-reaction. So if the camera is tilted forward, the motor rotates the camera backwards the exact amount. As both movements happen at the same time the camera stays absolutely steady. The following video by HeliPal is the one which kicked off my gimbal adventure.
Besides from eliminating shaking and rotation, the horizon stays absolutely level. This is a nice thing for motorcycle videos. When leaning into a curve the horizon is steady and the bike leans into and out of the image. If you don’t use a gimbal the horizon will tilt, while the bike remains steady in the frame. Therefore using a gimbal will produce more natural looking videos.
I did some research and identified three products which could be interesting:
– The Tarot T-2D gimbal, a product designed for quadrocopter drones
– The Rollei G1 eGimbal
– The ZhiYun Z1 Rider gimbal.
I tested all of those three gimbals and here are my experiences.
Tarot T-2D
As mentioned above the Gimbal is designed for quadrocopter drones, therefore some modifications and a special power supply are necessary. I got the idea from this video made by HeliPal (see above).
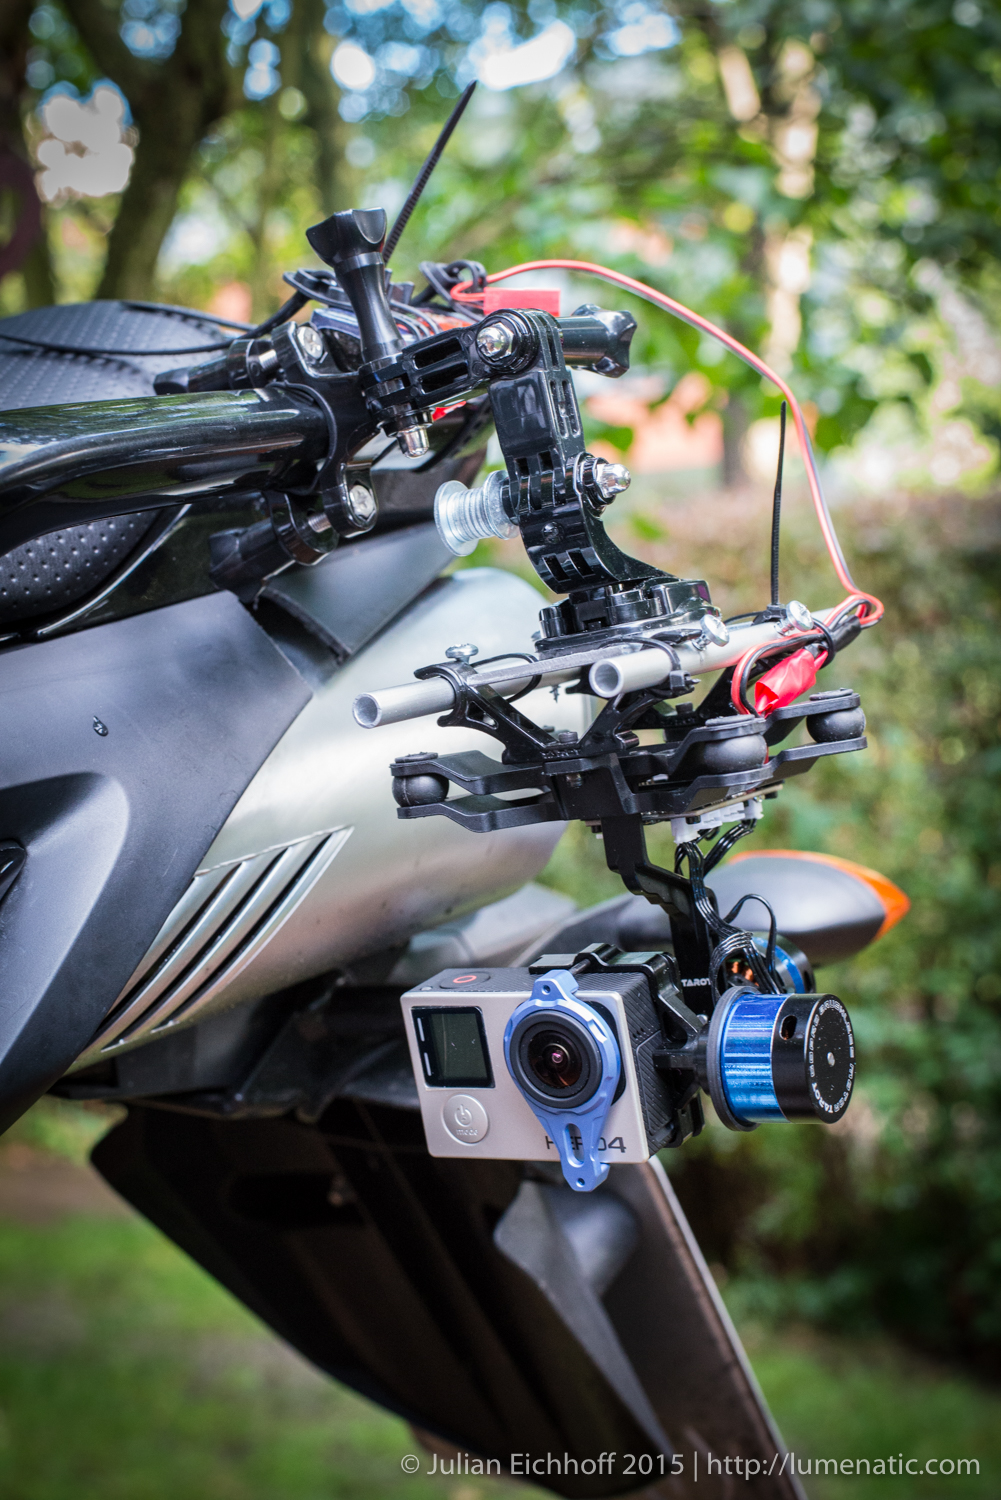
The gimbal is attached to the suction cup of the GoPro mount with an external battery strapped to the construction. Happily I ordered a Tarot T-2D from China and a few weeks later the package arrived. I knew that the gimbal required some assembly, so I started tinkering:
As you can see the assembly took some time. The construction is held together by tiny screws, so this was a little fumbly at some points. Attaching the gimbal to the suction cup required some extra tinkering, as you can see in thise image:

As the gimbal is designed to be mounted underneath a drone, special measures had to be taken. I used an adhesive GoPro clip adaptor and attached it to a metal plate. Two aluminum rods were connected to the V-shaped arms of the gimbal , everything fastened with cable ties. The screws which I drove through the aluminum rods are a precaution to prevent the rod from sliding out of the construction.
Another tinkering solution involved the connection to the GoPro shoe piece. The connector system of the GoPro consists of three lugs on the one piece which interconnect with two lugs on the other piece. But due to this special construction we would have three lugs interconnecting with three lugs. These can be interconnected , but you’ll need a longer screw and some washers to make it fit:

Unfortunately there was one thing I did not take into consideration. The guy in the above shown video from HeliPal drives a BMW with fairings. Those offer a large and smooth surface to place the suction cup. My Yahama FZ6 Fazer does not have fairings with a large enough flat area. Therefore I had to construct a behemoth of a fastening solution:
The cost: Gimbal 90 €, battery 13 €, battery charger 10 € (it’s a special battery type used for model aircraft – it’s got to be compatible with a drone, remember ?), electrical connectors 4 € (the board of the gimbal only has two blank cables, you’ll need the counterpiece for the battery connector).
Sum: 118 € plus two hours of assembly and tinkering.
The resulting video was more “meh” than “wow”. The horizon stays level when leaning into curve, but the construction is so heavy and instable that vibrations are induced, which can’t be stabilized by the gimbal.
I have to point out that I had to use another construction than the guys from HeliPal (their video is better). So if you can use the suction cup and make fairly short and compact design for your gimbal attachment, it might work for you.
I decided that this is not the way to go and sold the gimbal.
Rollei G1 eGimbal
Rollei also offers a two-axis handheld gimbal with a GoPro Mount. It is a very light and compact construction which requires a Hero3 battery to operate (sold separately). The GoPro can be charged while mounted in the gimbal, also there is a button to manually tilt the camera up and down (good function if you make a pan shot).
The regular price is 140 €, but I ordered an even cheaper one from Amazon Warehousedeals (68 €). It was a product a customer tested but sent back. I also had to purchase Hero 3 batteries as the batteries of my Hero4 won’t fit. Once all the pieces arrived, I stuck everything together and tested the gimbal.
It was a very short test. The motors emitted a high-pitched noise which was audible on the footage. I don’t think that this is normal, so it might be the reason the previous customer sent it back. I could have ordered a replacement product from Amazon due to the defect but I opted against it and go for the premium solution….
ZhiYun Z1 Rider
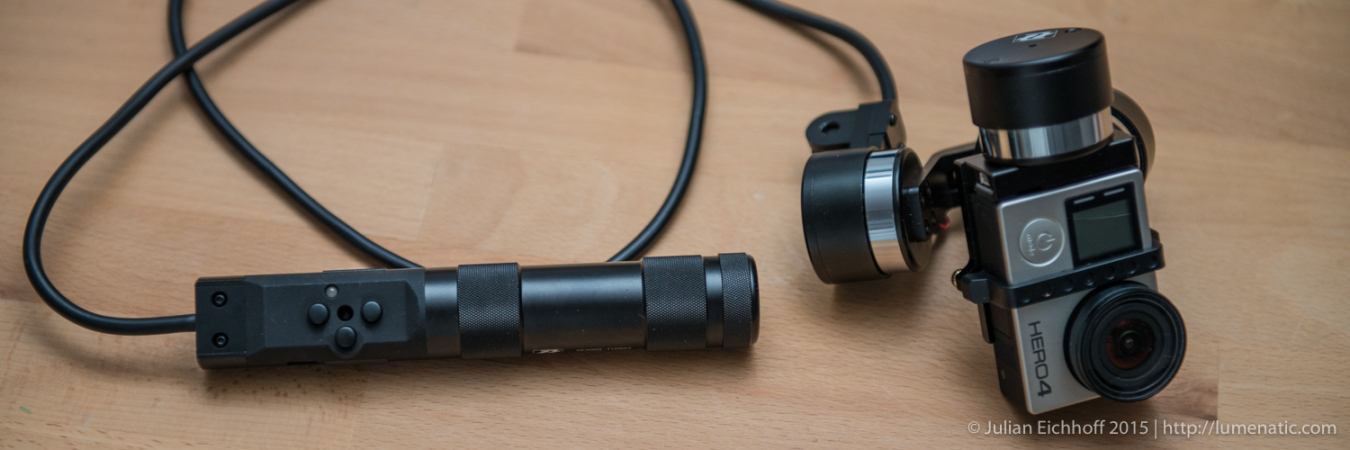
The ZhiYun Z1 Rider is a three-axis gimbal (the two previous gimbals only have two axes). It consists of a light gimbal head with a GoPro mount and a cable, which ends in a sturdy metal control/battery piece. During the ride you will have to store the controller either in your pocket or a bag or strap it to the bike.

The price varies widely, I got mine for 210 € from Amazon. Cheaper offers are available on eBay (shipping from China), more expensive offers can also be found on eBay and Amazon. Note that the product comes under different brand names.
To make it short – using the Z1 rider brought the results I anticipated. Stabilization is very good and the effects are spectacular. It can be easily mounted, operation is simple. The controller sports the same type of movement control as the Rollei – you can tilt the camera up and down for pan shots. Also the Z1 Rider offers three different stabilization modes:
Heading following mode: tilting up and down will be stabilized, panning horizontally will be smoothly followed.
Locking mode: The gimbal will point the camera into the exact direction it was pointing the moment the lock mode was activated. In other words: The camera will stay on target.
Heading and Pitch following mode: Panning the camera horizontally or tilting it upwards or downwards will be followed smoothly.
I took both camera and gimbal out for a test ride (gimbal in operation mode 1):
Works smoothly and absolutely satisfying. I tested several camera positions and they all look good. As you can see the control/battery unit had to be stored in a bag, pocket or be strapped to the bike. That is a drawback in that solution but one you can live with. That way the gimbal head can be very light and small. While riding in rural areas was fine I encountered an unexpected problem while riding at higher speeds on the Autobahn. When mounted on the handlebar vibrations will cause the gimbal head to “shake down”. No matter how strong you tighten the bolts of the GoPro connectors, vibrations of the engine running at around 5-6.000 rpm will shake the gimbal and move it downwards:
Apart from that, the ZhiYun proved to be a reliable and perfectly working gimbal for my GoPro.


