


While shooting a building near the Hannover fair grounds I manually underexposed the image to get some texture in the sky. When I controlled the image on the LCD screen I got big eyes. The sky – now with nice texture in the clouds – was full of dark specks. This, my boy, is dust on the sensor. And kind of a lot of dust.
The image above shows a test image – I just pointed the camera towards the sky and underexposed by -5EV, then modified the image in Photoshop (Auto Contrast) to emphasize the dust spots. I am not a camera technician, but I surely know that now is the time to clean the sensor. But let’s have some thoughts on dust and dirt on the sensor beforehand.
How does dust get into the camera ?
Dust is everywhere. The particles are suspended in the air and everywhere you go there is dust. Each time you change the lens you open the camera. It is inevitable that some dust enters the camera cavity. There are only two things you can do here – face the camera downwards, so that at least heavier particles can’t sink into the camera while it is open and – even more important – change the lenses quickly. Ok, a third tip would be not to change lenses in an especially dusty environment (e.g. it would have been a very bad idea to change lenses during the Porsche shoot I conducted since the hall we worked in was full of sawdust).
The second source for dust is zooming. Everytime you zoom the lens the lens extends, lens groups move back and forth. When the lens barrel extends, you also extend the volume inside the lens. This volume fills with air from the environment. And the air is – bingo – full of dust. So every time you zoom keep in mind you are pumping dusty air in and out of the camera. Eventually dust builds up inside the lens and some dust particles will make it to the sensor.
In how far does the dust affect the images ?
Up front – Dirt on the sensor is not good and one should get rid of it (rid of the dirt, not the sensor). BUT. In how far did it affect my work ? Well, until I noticed the dirt it was not a problem. I own my D800 for over a year now and I have never cleaned the sensor before – I never noticed the dust spots until now. So it is not very critical to have some dust spots on the sensor. They either don’t show up because they are in an area of the image which is well or overexposed or they can be magically removed by software (I know Lightroom can does remove hot pixels automatically – perhaps also dust spots ?).
To wrap this point up – it is wise to have a clean camera/sensor, but don’t get too fuzzy about a few specks of dust on the sensor. They are inevitable and if you don’t see them on your images – do they matter that much ?
How to tell if your sensor has dust on it
See above-shoot an image of a white wall or the sky – something neutral should do. Underexpose the image a little, set the image out of focus intentionally. You can even move the camera around during the exposure. The dust os on the sensor and won’t get blurred because it makes every movement the camera makes, too.
Countermeasures
Once you decide that your sensor needs cleaning you have several options.
Before I start spilling my guts on sensor cleaning here is an entertaining video from DigitalRev TV about sensor cleaning if you are too lazy to read:
1.) In-camera cleaning.
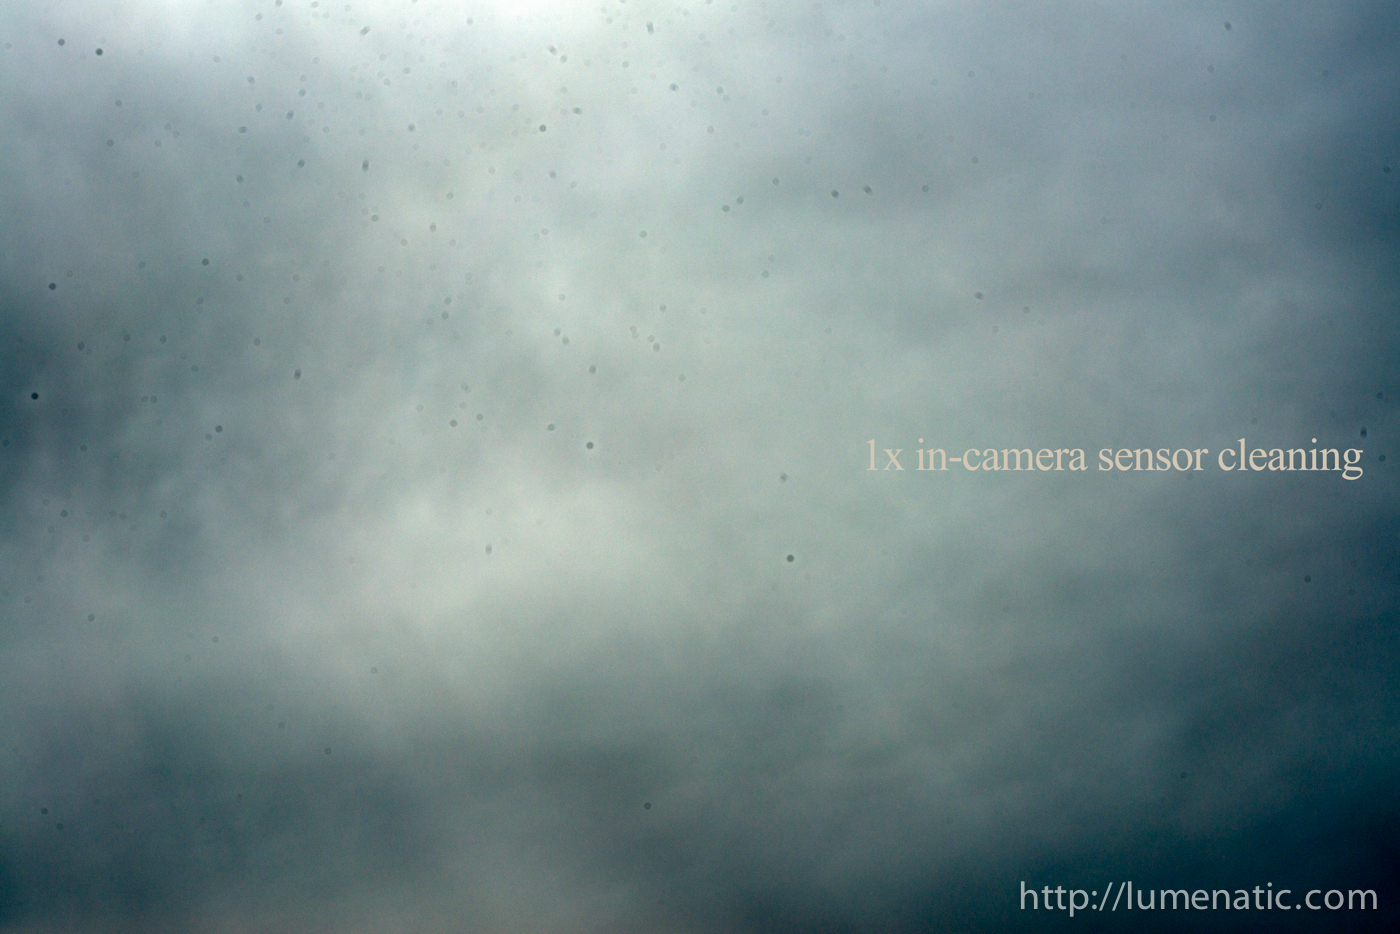
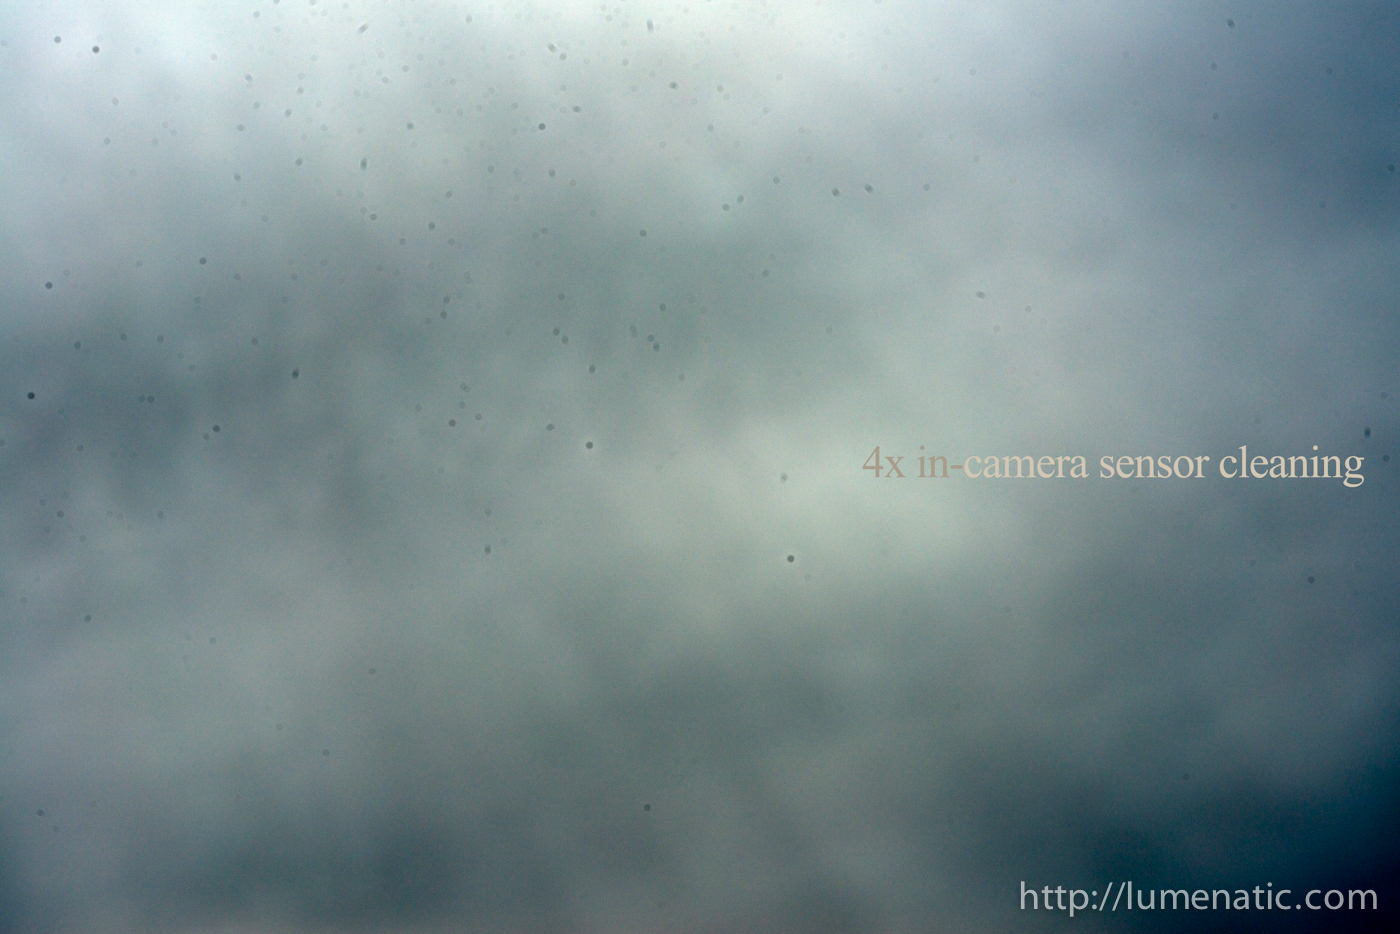
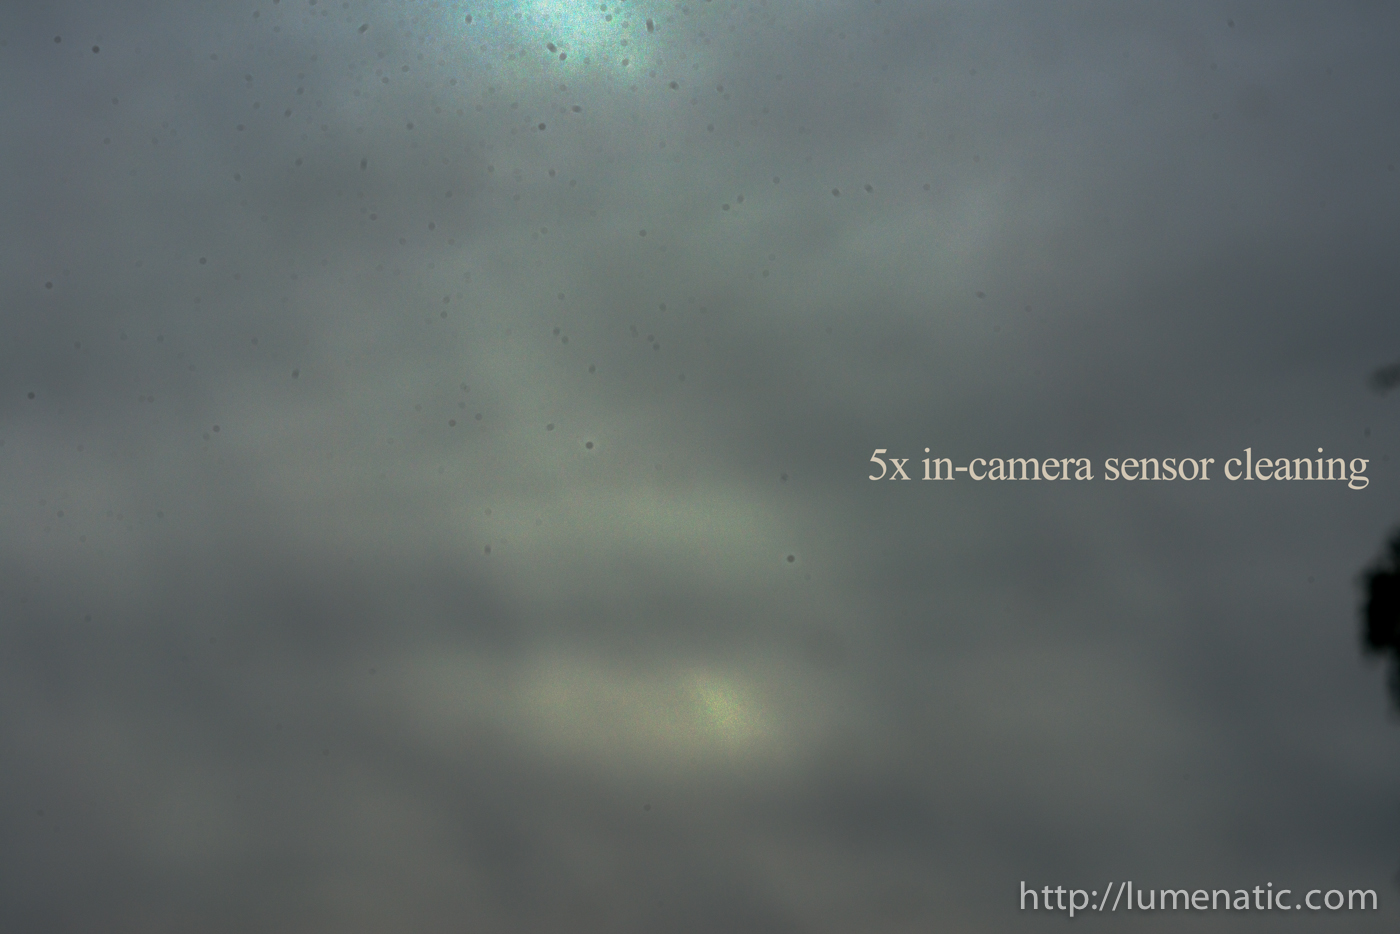
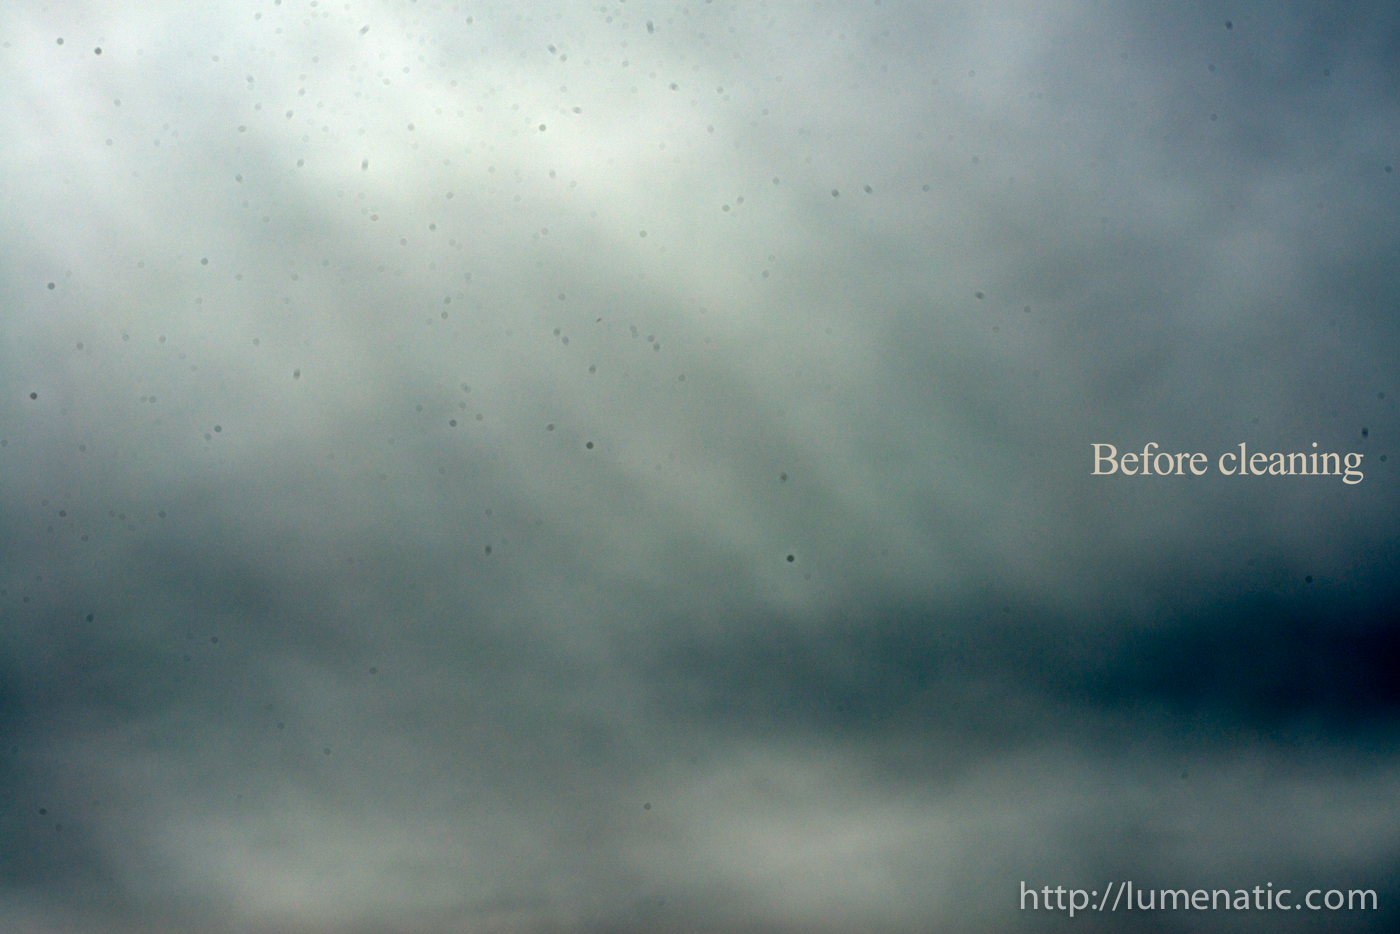
Most camera models today have this option. The sensor is mechanically shaken by ultrasonic waves, shaking the dust off the sensor. Well, that is the theory. In practice this concept did not convince me. I made a series of six images – the first one without cleaning and the subsequent five images with one sensor cleaning action each. Prove me wrong, but the dust does not seem to be very impressed by being shaken. Do you see any difference in the spots between the images ?


2.) Give your camera to a professional cleaning service.
Most camera stores and camera manufacturers offer sensor cleaning. The price is around 40-60 Euros depending on where you go. This has the drawback that you have to give the camera away for a short period of time and it costs money. But on the other side you can be sure that the cleaning will be done by professionals (hope so at least 😉 and if something is damaged during the process the repair is paid for (this is what I assume from what I would expect as a customer, but urgently check the terms and conditions of the company you give your camera to !).
3.) Clean it yourself. Here we have three basic options.
(Disclaimer: These are ideas and thoughts, I can not be held responsible if you damage your camera during the cleaning process. If you want to be on the safe side, let a professional camera technician clean your camera sensor. Only try to clean the camera sensor by yourself if you are one hundred percent sure about what you are doing !)
3.1 Poor man’s sensor cleaning.
- Mount your camera on a tripod, facing downward. Remove the lens, expose the mirror (there is a menu for locking the mirror up and opening the shutter blades for inspection and cleaning. Read the manual.
- Use a rocket blower or similiar to blow the dust from the sensor. In theory the dust is blown off and falls out of the camera. This might work for at least getting rid of the bigger dust bits, but in fact with each burst from the rocket blower you blow air with dust into the camera. As an alternative you can use compressed clean air from a can. Be sure the product you use is safe for cleaning purposes, so that you don’t blow oil or other fluids on the sensor which might be in the compressed air canister.
3.2 Sensor swabs
Sensor swabs are basically a small plastic stick with a lint-free special towel attached to them. There are versions with and without cleaning fluid. The idea is to swipe over the sensor surface with the swab and brush the dust particles away. Works well, relatively safe if you know what you are doing and, by the way, that is what is done when you give away your camera for cleaning. If you feel confident enough to do it yourself – get some sensor swabs (look for “CCD swabs” or “sensor swabs” on eBay or Amazon), expose the sensor and clean the sensor.
3.3 Sensor film
Sensor film is an emulsion which is painted on the sensor with a fine brush. Once the emulsion dries one can peel it off the sensor and all dust particles are stuck in the emulsion. Sensor film is water based and does not damage the IR filter on the lens. It is a very effective way of cleaning your sensor but needs an extremely steady hand during the application of the emulsion. Many people have used it, it is a very successful product on the market with lots of happy end-users. Well, except me. A few years ago I used sensor film on my D70s and, being a jackass, I painted a little emulsion into the rail in which the shutter curtain runs. This meant new shutter blades (250 €), which was about the residual value of the camera.
I have to point out that sensor film is a very good and clever product and that the damage was caused by my own fault. If I had handled it a little more carefully, nothing would have happened.
3.4 Fix it in post
Some camera models offer the option to record a reference photo for dust removal. You snap a picture against a neutral background and the camera records the dust specs, creating a profile which is applied to each subsequent image. The specs are removed by the camera software. As an alternative: Photoshop can also de-dust images automatically.
My personal opinion is that this should only be a workaround until the sensor can be mechanically cleaned. You have to do a cleaning at some point anyhow, so the software removal of dust should only be a temporary solution. But again, that is only my personal opinion.
There might be sensor cleaning options I have missed, but the ones I listed are the most common ones. To clean the sensor of my D800 I have ordered sensor swabs ( 9 € for eight pieces). Let’s hope I don’t succeed in damaging it again.
